Home Studio

Home Studio
Simple but Sweet!

Sunday, February 28, 2010

Piano or Keyboard? Part II

Though digital keyboards are not identical, they follow the same basic recording guidelines.  To begin, let's first explain that modern keyboards have several ways of transferring digital data out of the keyboard and into various recording and live applications.  The most common outputs include:
  • USB--which allows connection to a computer or computer interface
  • MIDI--which allows the transfer of data to external sequencers and other various MIDI compatible devices 
  • 1/4" Instrument Cable--which allows the instrument to be connected to an amplifier and/or a mixer (live or studio) 
Output connections are available on the back of most keyboards.  Higher end keyboards will  have both a left and a right output for 1/4" cables, so that you can record in stereo if you wish.  My setup, for this example is in mono, has a 1/4" cable running from the output of my Motif 8 to the 1/4" input of my Roland VS 1880 studio recorder.


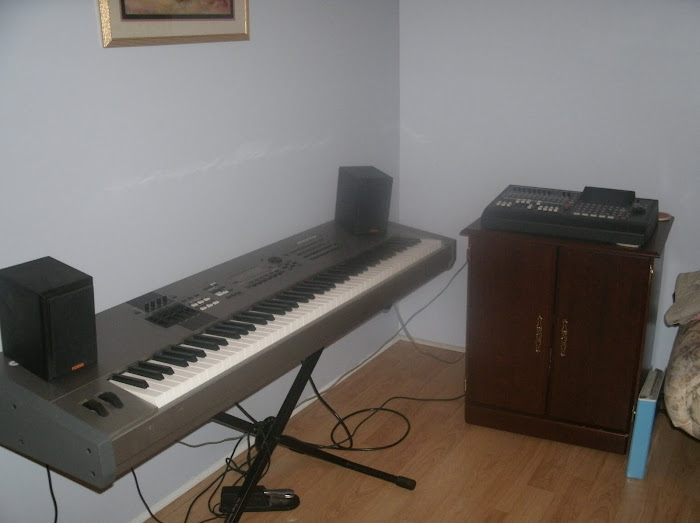
 I have an orange output cable running from my Motif 8.  Notice that since I'm only using one cable it is in the L (left)/Mono jack.  If I was running two cables one would be in the R (right) output and the other in the L (left)/Mono output jack.


 This is the back of my Roland VS-1880 mixer.  The orange cable with the blue tape on it is the input from my keyboard (above) into the mixer.  Be advised that the longer the distance the signal has to travel from the keyboard to the mixer, the more likely that the signal strength will be compromised.  The rule of thumb is to always use the shortest cable possible to limit the distance the signal has to travel which will maximize signal strength.  

Once you determine what type of connection you need to connect to your recording gear, then it's time to connect and power up.

The next obstacle is to set the appropriate recording level for you keyboard.  Setting the recording level occurs both on the keyboard and on the studio mixer.  The volume on the keyboard must be at least 3/4 of the way up, otherwise, the signal strength will be too weak to properly record.  One might think that simply compensating on the studio mixer itself would suffice; however, even if the studio's mixer input volume is all the way up, the signal will still be too weak and make for a less than desirable recording.


In the above photo, the slider on the left is the Master Volume on my keyboard.  The four additional sliders are basically assignable; however, I frequently use them for individual volume controls when I play layered sounds on my keyboard.  Basically, if I play four sounds at one time, I can individually control the volume of each sound by using these sliders.  If that were the case, then all volumes would need to be at least 3/4 of the way up in order to maximize signal strength. 


Next, I simply select track #4, which is the track I always use to record the keyboard part, and then adjust the volume (line input knob and slider) to the highest possible recording level without red-lining.  More so than with tape (reel-to-reel) recording, digital recording is sensitive to signal limits.  Often with an analog recording you can exceed the input limits and playback is not distorted; however, if your red light clips on a digital recording then it's necessary to back off the volume or the final playback will be distorted.  Analog music records the actual continuation of the sound wave, which is often referred to as capturing a softer and warmer sound.  Digital music is an accumulation of snapshots from the sound wave that is then combined to create a jagged picture of that sound wave.  The 1993 MTV You-Tube video below, does a great job explaining the difference between an analog signal and a digital signal. 


Digital inputs for recording purposes includes the absences of part of the music; however, it also requires that digital music is quite stringent in that every error does seem to be captured in its exact format.  Similar to the views of Dave Mustaine (from Megadeath) in the above video, musicians that don't like digital "suck--can't play" rather I feel that it points to the exactness of digital recording which captures the errors in the recordings without softening the edges like in analog recordings.  Digital leaves a singer and/or musician naked at least until effects are added.   

To correct the input levels in order to avoid distortion, reduce the input volume by trimming small amounts with the mixer's fader/slider, larger amounts by the mixer's line input knob (similar to a gain knob), and finally minimally adjust the volume on the keyboard itself, only if the signal is still red-lining.


In the LCD window the two bars on the upper left are the input levels of a recording.  If you look closely you can see the number 12 is bold and highlighted that is because this is the minimum acceptable signal strength for a recording.  The VS-1880 has a clip light located on each track next to the line input knob--not visible in this photo.  


In a matter of a few minutes, you can connect a keyboard to a recording device and start producing your music.  The quality of the sound of the instrument is dependant upon the quality of your equipment.  As we discussed in Piano or keyboard? Part I it is possible to record a "real" piano, though the expectations to record a quality sound are the same for both instruments, the keyboard eliminates many frustrating obstacles for the home studio engineer.

Sunday, February 21, 2010

Piano or Keyboard? Part I

Size does matter!  The first consideration when deciding whether or not to record an acoustic (aka "real") piano is -- size.  Will a full size piano fit in your home recording studio?  Do you own a piano?  If not, do you have muscular friends willing to assist in moving a borrowed piano into your home studio?  Moving a piano isn't fun.  But, let's consider what recording factors also have to be considered to record an acoustic piano.

How noisy are your neighbors?  Anytime an acoustic instrument is recorded without the use of an isolation/sound proof booth, consideration has to be given to the surrounding noises.  At my house noise is a big problem.  For example:  I have three active four wheeler riding kids, my husband is a sci-fi TV watching kind of guy, I have three barking dogs, and yes, noisy neighbors too.  So, why is this a big deal?  Almost fifteen years ago, a gospel group I worked with did a recording project at one of my friends house.  Aware of the noisy surroundings of the studio we chose to work from midnight to 3:30am because this was the most quite time.  Exhausted we sat down a few nights later to listen to the project, thus far, and could hear the engineer's house cat meowing on one of the tracks. (Grin)  In order to ensure that unwanted sounds are not picked up on your recording tracks its necessary to carefully analyze the surroundings.

Now let's consider the studios acoustics.  Novice often forget to consider the room acoustics.  A piano (like any other acoustic instrument) sounds completely different in every room.  It all goes back to the old sound wave and how it vibrates and travels.  Sound is affected by several factors, including:  the heighth of the ceiling, the size of the room, the amount of occupied space in the room, as well as the texture of the surfaces in the room.  Howstuffworks.com recently explained,
Sound is constantly being reflected off many different surfaces.  Most of the time the reflected sound is not noticed, because two identical sounds that reach the human ear less than 1/15 of a second apart cannot be distinguished as separate sounds.  When the reflected sound is heard separately, it is called an echo. 
Generally speaking, a sound (which is a vibration) causes a chain reaction of the continued vibration which travels through the air.  When the vibration hits a mass the vibration reacts.  The reaction is dependent upon the surface of the mass.  If the surface of the mass is hard, like tile, then it reflects and continues to bounce.  However, if the surface is spongy, like a carpeted wall, then the sound vibration is absorbed rather than reflected, causing less or no reverb aka "echo."  Think of the analogy that people sing better when they sing in the shower. Truth is, they don't sing better in the shower, but rather they sound better in the shower because the sound is reflecting so much it adds a lot of reverb to the sound causing it to soften and cover up quite a bit.

Establishing an understanding of the acoustics of your studio room will be an added resource when considering microphone placement for recording the piano track.  Here's my basic guide line for successful microphone placement:

  • Is the sound too strong?  If the mic is too close to the source of the acoustic sound it can make it very difficult to get a good quality sound.  With the piano, a mic placed too close is likely to record the actual hammering of the keys, as well as, any squeaks within the framework of the piano.
  • Is the sound too weak?  This occurs when the microphone is placed so far away from the piano, that when the piano track is played back, it sounds like its been shipped to another location far away.  You try to boost the gain and increase the recording input; however, it's not going to fix until the mic location is balanced out.  
  • Find the sweet spot.  Believe it or not, every room has a sweet spot.  A sweet spot is the one place in any given room where stuff (pianos, guitars, TVs, etc) actually sounds better than in any other place in the room.  Usually it's in the middle of the room, but it's relative to the ears making the determination.  
  • How many microphones do I need to record this instrument?  Bottom line, when you play back the recording and it sounds like its missing something, add another microphone to fatten the sound of the instrument you're recording.  If you use two microphones, pan one to record left and one to record right, then congrats you're now recording in stereo.  Another cool feature of additional microphones, is that you can pick up the sound at different wave widths that add rich texture to the sound quality.   
As you can see there's much to consider when recording an acoustic instrument.  However, I encourage you to give it a whirl because it is a great experience.

Sunday, February 14, 2010

No longer in the bedroom!

I've moved my home recording studio too many times to count. Each time that I have set all of my equipment up there has been some type of event that causes the equipment to carefully be taken down, boxed up, and stored for long periods of time. Each time I calmly dismantle my beloved equipment and dream that one day I will have a space to call my own. I suppose you're thinking, "You're grown and own a house. Figure it out." Yep, that's true. But I also have three kids still living at home, a husband, and a grand-daughter that visits. What ever shall I do?

This weekend my husband and I installed carpet into a small addition to our home. Yes, it has finally happened. My studio has a home. My labor of love is graciously reaching fruition. No longer will the sequencers, microphones, and guitars be forced to remain in their cases stashed in my closet. We (the equipment and I)have been liberated to pursue creativity and function.

As I sit and spin in my office chair, I am amazed in the difference a day makes. The walls are painted, the carpet laid, and yes, the equipment is unpacked. I am finally out of the bedroom.

Sunday, February 7, 2010

My Story

   
     A quick lesson, a cute guy, and a big crush changed my life forever. I get asked all the time, "How did you learn to play the drums?"  After all, the drums were the first instrument that I learned to play.  My childhood was filled with talented musicians and singers.  Every Friday night my parents would have church friends over (who also were singers and musicians) and they would sit around a camp fire or hang out on the patio and play guitars and sing for hours. Then by the time my brother (Jimmy) had became a teenager he was in love with his guitar and he was a good lead guitar player.  He started a country group and his band practiced in our family’s music room.  His drummer was Mike Palmer (later famous as the drummer for Garth Brooks).  I was eleven and had the biggest crush on Mike.  I kept asking Mike to teach me the drums.  I aggravated him until he finally taught me how to keep a basic beat on the drums.  That was the beginning of becoming a drummer.  Thank God for childish crushes!  (lol)    

     One year later my parents started to pastor a little country church.  My dad persuaded me to "try" and play the drums by stating that he would purchase a drum set if I could play.  That afternoon we went up to the church and I gave it a try.  My dad offered some instruction while he was playing the guitar and that was pretty much it.  The dream began thirty minutes later while playing a set of old Ludwig drums to "I'll fly away".  I don't know how I could play without lessons, it just happened.  I wasn't studio worthy, but I could keep a beat and accent with a crash cymbal.  My dad stayed true to his word and took me to Thoroughbred Music where he bought me my first drum set and opened up a whole new world to me.
   
     As the story continues, the church grew and musicians came and went.  However, I was not prepared for how this would affect me.  I guess you could say my dad was resourceful.  If there was another drum player attending church, my dad would move me to fill in on whatever instrument that was not already occupied by another musician.  The sequence occurred in the following order:  drums, bass guitar, rhythm guitar, and then piano.  I hated it when I had to change instruments, but because of it I learned how to play them all fluently. 

     I enjoy the fellowship of other musicians.  Everyone needs something that they can do or some way to express their feelings and emotions--for me, its playing music.  When I play an instrument, it provides me with an outlet to release my emotions and also an opportunity to minster to others.